Accelerometer and Gyroscope Calibration
INAV requires you to follow the accelerometer calibration steps below. These steps are different to Cleanflight & Betaflight. Please don't skip reading this section; it's vitally important.
This page introduces the function of the accelerometer and compass and the steps needed to calibrate both. The accelerometer calibration is mandatory for any setup. The compass calibration is required only if using a compass.
The sensors on your flight controller might be biased and gains on the axes might be different. INAV uses an advanced 6-point calibration to take care of all irregularities your flight controller sensors might have.
Accelerometer Calibration Steps
Modern accelerometer sensors are precise, but they require calibration if we want accurate measurements. Unlike the simple level calibration used in cleanflight & betaflight INAV uses a 6 point accelerometer calibration process.
You may find this easier to do more accurately prior to installing the flight controller in your model and this procedure MUST be done referenced to the marked orientation on the board.
See calibration procedure below:
If the flight controller is mounted in another angle or upside down, do the calibration steps with the flight controller pointing as shown in the pictures in INAV Configurator, not based on the orientation of the quad or fixed wing model itself. Calibration won't work otherwise.
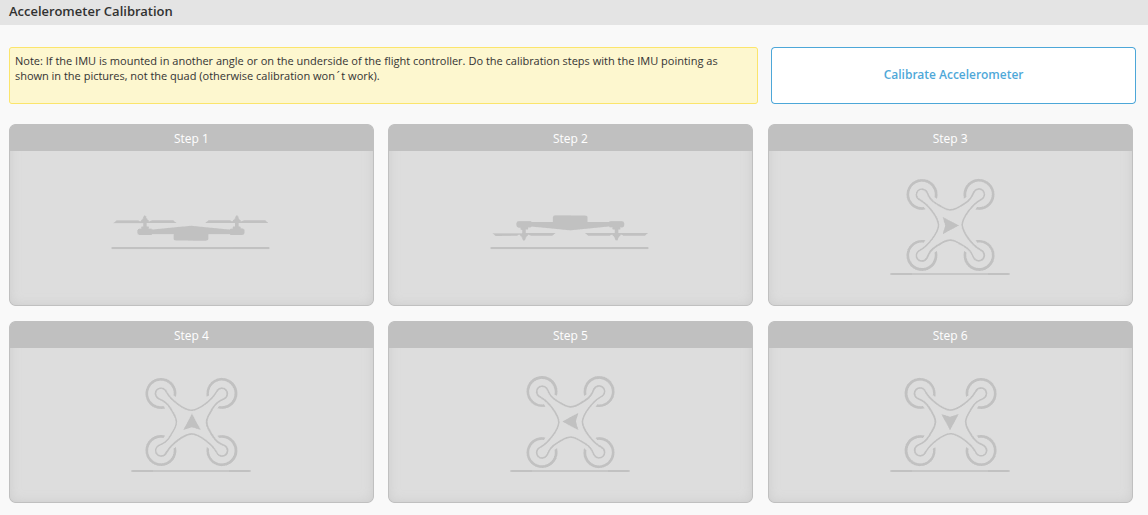
-
Connect the flight controller to INAV Configurator and select the Calibration tab.
-
Place the flight controller level (position 1 as shown in the picture) and press the Calibrate Accelerometer button. Advanced calibration has been activated and has recorded the first data point.
-
Place model on all sides in sequence (positions 2 to 6): on its back, right side, nose up, left side, nose down. Press "Calibrate Accelerometer" button for in each position. The advanced calibration algorithm will record 2nd to 6th data points.
-
After all 6 positions have been recorded advanced calibration will calculate offsets and gains, then store them in the flight controllers EEPROM. Accelerometer calibration complete (YAY!).
-
Use the CLI tab to verify that accgain_x, accgain_y and accgain_z parameters are NOT 4096. If they are, algorithm failed to converge, calibration failed and needs to be repeated. In addition, acczero_x, acczero_y, acczero_z, should not be 0 any more.
There is no need to place the model perfectly aligned, the algorithm does not care about exact positions as long as they are close to 90 degree apart and copter is stationary in every position.
Board Orientation and Level Calibration
If the FC board is rotated in any way that differs from its default orientation markings, the board alignment settings must be changed to match (see the "Alignment Tool" tab in the INAV configurator).
You can verify the correct board orientation by banking your your aircraft left and right, forward and back and rotate left and right. In all examples the 3D model image in configurator must move accordingly.
Accelerometer calibration does not record a leveled model.
For level flight and navigation features to work you need to trim the firmware to level flight using "Board Alignment" on the "Configuration" tab. The readings should show close to 0.0 on all axis when the aircraft is laying flat.
To trim out unleveled flight / drift using stick commands is really useful.
If using CLI to set up board alignment, angles are set in degrees*10, so if you need to trim your board 1.5 degrees you should enter "15".